Save now, cook later.
How to Cook Beans
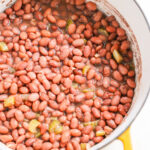
Once you've made tender and creamy homemade beans, it will be hard to go back to canned. They're flavorful, nutritious, easy in a few simple steps, and the perfect addition to nearly any meal.
Servings: 8 to 10 Servings
Ingredients
- 1 lb dried beans such as pinto beans, but nearly any kind will do (see notes)
- 6-8 cups vegetable stock or broth or water
- 1 bay leaf
- 1/2 medium yellow onion, peeled and halved peeled and halved (optional)
- 2 garlic cloves minced (optional)
- 2 stalks celery (1 cup) chopped (optional)
- 2 tsp salt optional
- 2 tbsp avocado oil or other type of oil (optional)
Instructions
- Sort the beans, removing debris or irregular pieces.
- Add the dry beans to a large bowl or pot. Cover them with at least an inch of cool water. Cover and let the beans soak for 8 hours or overnight.
- Drain and rinse the soaked beans in a colander, then transfer them to a Dutch oven and cover with the water or stock/broth. Add the bay leaves, onion, garlic, and celery (if using). Cover the pot with a lid and bring it to a boil. Skim off any white foam that floats on top of the water.
- Reduce the heat to medium-low simmer the beans with the lid ajar until they are tender, about 60 minutes for most beans. This may take up to 90 minutes for some beans, like kidney beans. Check their doneness at the 45- and 60-minute marks and add on simmering time as needed. Add more liquid if needed.
- Season the beans with salt in the last 5 minutes of cooking time. If you'd like creamier beans, add a couple of tablespoons of oil, or use a spoon to mash some beans on the side of the pot.
Video
Notes
Storage Directions
- Refrigerating: Once cooled to room temperature, the leftover beans can be kept in an airtight container in the fridge for up to 5 days.
- Freezing: For longer storage, the cooled beans can also be frozen in a freezer-safe container for up to 3 months. For easy, meal-prep-friendly defrosting, portion the beans in a silicone tray before freezing.
- Don't skip the sort and rinse! Even the package of high quality beans can occasionally contain small pieces of debris (think: pebbles, dirt, or insects) or mis-shapen, discolored, or shriveled beans. Remove them before rinsing the beans thoroughly in a colander to remove any dust or dirt.
- Skip the foam off the top. This sudsy, off-white layer contains starches, proteins, and the compounds (oligosaccharides) which can cause gas and digestive issues. Removing it improves the beans' flavor and makes them easier to digest.
- Test for doneness. Many factors—such as their freshness, water mineral content, altitude, and more— affect how quick or slowly the beans cook. Check them at the 45 and 60 minute marks and add on additional simmering time as needed.
- Add additional time for altitude. If cooking at 3,500 feet or higher, you may need to add 15-30 minutes of simmering time, as the lower atmospheric pressure necessitates longer a longer simmering time (source).
- Mind water hardness. Beans will need to simmer longer in hard water, as it contains extra minerals that can make it more difficult for the water to penetrate the bean skins.
- Make them creamy. For a silkier texture, add up to two tablespoons of grapeseed oil or another oil (such as olive or avocado oil), or smash some of the beans with a spoon during the final few minutes of cooking.
Nutrition
Calories: 205kcal | Carbohydrates: 38g | Protein: 13g | Fat: 1g | Saturated Fat: 0.1g | Polyunsaturated Fat: 0.3g | Monounsaturated Fat: 0.1g | Sodium: 1302mg | Potassium: 810mg | Fiber: 9g | Sugar: 3g | Vitamin A: 421IU | Vitamin C: 4mg | Calcium: 54mg | Iron: 4mg